How to: Troubleshoot the mBot
General errors getting started
The screwdriver doesn’t fit the screw
The screwdriver can work with two different screw types. To change the screwdriver head, pull the metal part from the handle and insert it back into the handle the opposite way around.
The robot does not respond correctly to the remote control (without additional coding)
The motors might be wired the wrong way around. This will be clear when controlling it with the remote control as it will turn the opposite way to the button that is pressed, i.e. pressing the left button will make the robot turn right. To fix this, disconnect and reconnect the motor wiring in the correct arrangement.
I can’t see the Upload to Arduino button
In mBlock, make sure you have selected the following menu option: Edit > Arduino mode.
The program won’t upload to the mBot
- First check the cable is connected correctly between the mBot and the computer.
- Check that the mBot is turned on.
- Using mBlock, make sure you have selected the following menu options: Boards -> mBot (mCore) Connect -> Serial Port -> (last COM option)
If it still doesn’t work after these steps:
- Try restarting mBlock and the mBot.
- Then try swapping the USB port the cable is connected to on your computer (some USB ports are different).
- Swap the USB cable for a different one. Cables can become faulty, so try one that is working for a different group.
Not all my blocks of code are being run
Make sure they are all connected together in mBlock. Sometimes code blocks can be near each other but not actually connected.
The sensors aren’t working
Make sure they are fully connected to the correct ports.
Difficulties with lesson challenges
The robot doesn’t stop in time when using the ultrasonic sensor
Make sure the distance that you have chosen in the ultrasonic sensor block isn’t too small.
This will ensure you give the robot time to stop. The distance you need to set will be affected by the speed. If the robot is driving fast, you may need to make the distance larger.

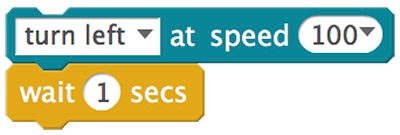
The robot isn’t turning the correct amount
Turning is affected by the speed of the mBot, how much time it is turning for, and the characteristics of the surface the mBot is on.
If the mBot needs to turn more (a sharper turn), try increasing the amount of time it is turning for first and then consider increasing the speed. Especially on rougher surfaces, like carpet, you may need the mBot to turn for a longer time or more quickly than you need on a smoother surface, like tile.
Robot keeps losing black line when working with the line follower
Black lines might be too close together or too narrow. Bad lighting can also confuse the sensor.
The robot doesn’t have space to turn
Try adding code blocks to reverse the mBot first.
The robot doesn’t respond as expected to the remote control when the students program it
Refer to Answer Sheet 5 from the lesson resources for Lesson 5 in Code Smart 7-11 or Code Smart 11-14 to help you.
The robot lights stay on after I’ve finished with them
If you do not turn them off the mBot lights will stay on as long as the robot has power. You should include a block like the following to turn off and reset the lights when mBot is driving forward. See the code example


Computing | Ages 7-11
Code Smart
Code Smart is a computing and robotics education programme based on driverless car technologies. Code Smart takes students on a journey from complete beginners to code creators.

Computing | Ages 11-14
Code Smart
Code Smart is a computing and robotics education programme based on driverless car technologies. Students will develop their ability to code as well as their design thinking as they tackle smart city challenges.